Setting up an SSO (Single Sign-On)
Biamp Workplace supports the following identity management services for SSO:
- Google Workspace
- Microsoft Entra ID / Azure AD
- Any custom OIDC
Changing email domains: This procedure can also be used to change the email domain used for an existing SSO.
SSO setup procedure
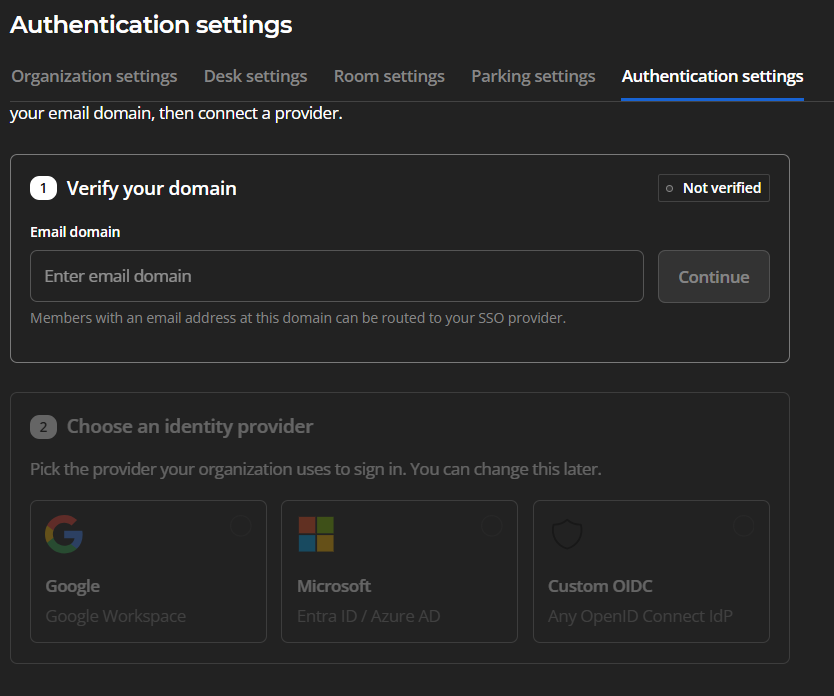
Open the organization's Settings page in its Workplace web portal admin console and select the "Authentication settings" tab.
1. Enter the email domain that will be routed using your SSO provider in the first field.
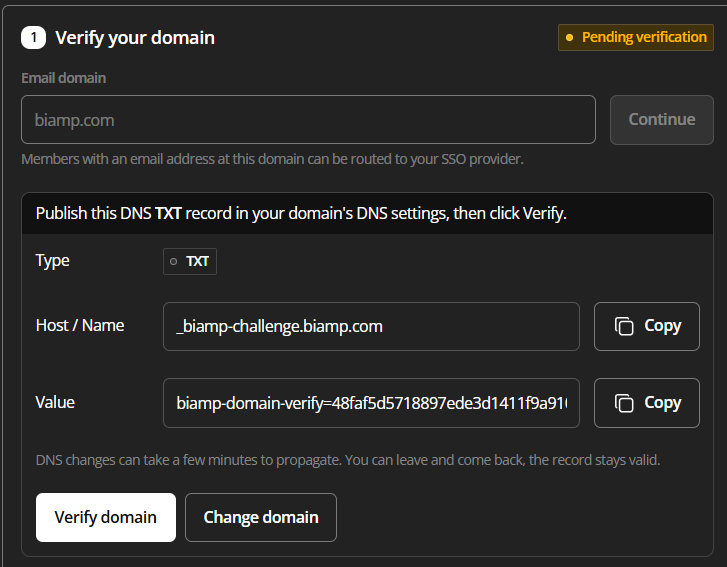
2. Verify the domain using the provided verification panel.
- Copy and publish the provided DNS TXT record in the domain's DNS settings.
- The provided hostname
- The provided value
- Select the "Verify" button at the bottom of the panel.
- Please note, it may take a few minutes for changes made to the DNS settings to be verifiable.
Keep the DNS record: Biamp strongly recommends maintaining a copy of the DNS record, even after the domain has been verified. Biamp Workplace periodically re-checks verifications. If the DNS record is lost, it can impact continued use of the SSO.
Only publish 1 entry at the DNS host: The verification will fail if 2 TXT entries exist.
3. Select the identity provider your organization uses for its universal sign-ins. This can be changed at a later time if needed. Biamp Workplace supports:
- Google Workspace
- Microsoft Entra ID and Azure AD
- Any Custom OpenID Connect IdP
Selecting the Google or Microsoft options will initiate the setup with those identity services.
Connecting with a custom OIDC identity service
Selecting the OIDC option brings up an application form to submit to the service provider. The Google and Microsoft ID service configurations are automatically set by those service providers and do not require an application.
1. Fill out the application form.
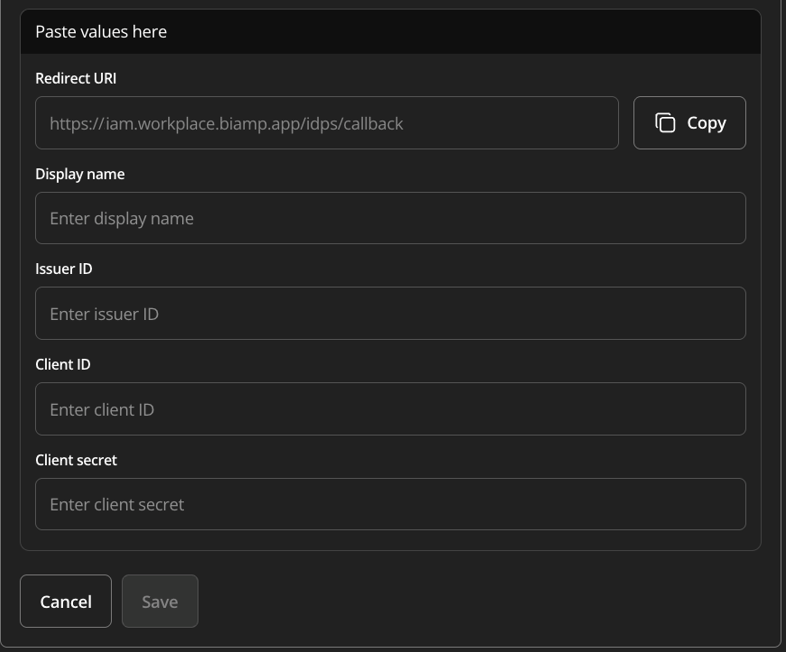
- Display name: This field is the admin's choice.
- Issuer ID, Client ID, Client Secret: These are provided by the issuer during the OIDC setup.
Verifying the issuer URL: If you are uncertain the issuer URL is correct, open "<issuer>/.well-known/openid-configuration". A valid OIDC provider supporting OpenID Connect Discovery should return a JSON document containing an issuer field. The value of the issuer should match the issuer URL you are configuring for.
2. Select "Save" once the form is filled out and its content verified.