Overview of Location Plans
Location plans are configured by organization admins and owners to generate three types of floor location maps in Biamp Workplace organizations.
-
Administrative maps: Used in a Workplace organizations admin console by administrative-role uses.
-
Booking App floor plans: Used be all administrative and end-users in the Biamp Workplace Booking app as navigation and booking aids.
-
Overview screens floorplans: Shown on public display screens.
A configured floor-type Location plan can be used to generate all all three map types.
About location plans
Plans are created in the Workplace admin portal under the Locations tab and require uploading an image file of the physical layout to the Workspace Location. This image will be used to map workplace locations and devices to the physical space.
Locations plans are typically created for floor locations, however, there may be instances in which a site building map can't be created.
For more information on how to create a location plan, see Creating a Locations Plan.
Floor map types
Administrative map
Administrative maps can be viewed in an organization's Workplace admin console under the Locations tab. If a location plan has been configured for a location, the administrative map shows the location and statuses of assigned bookable spaces as well as installed and licensed booking and audiovisual devices,
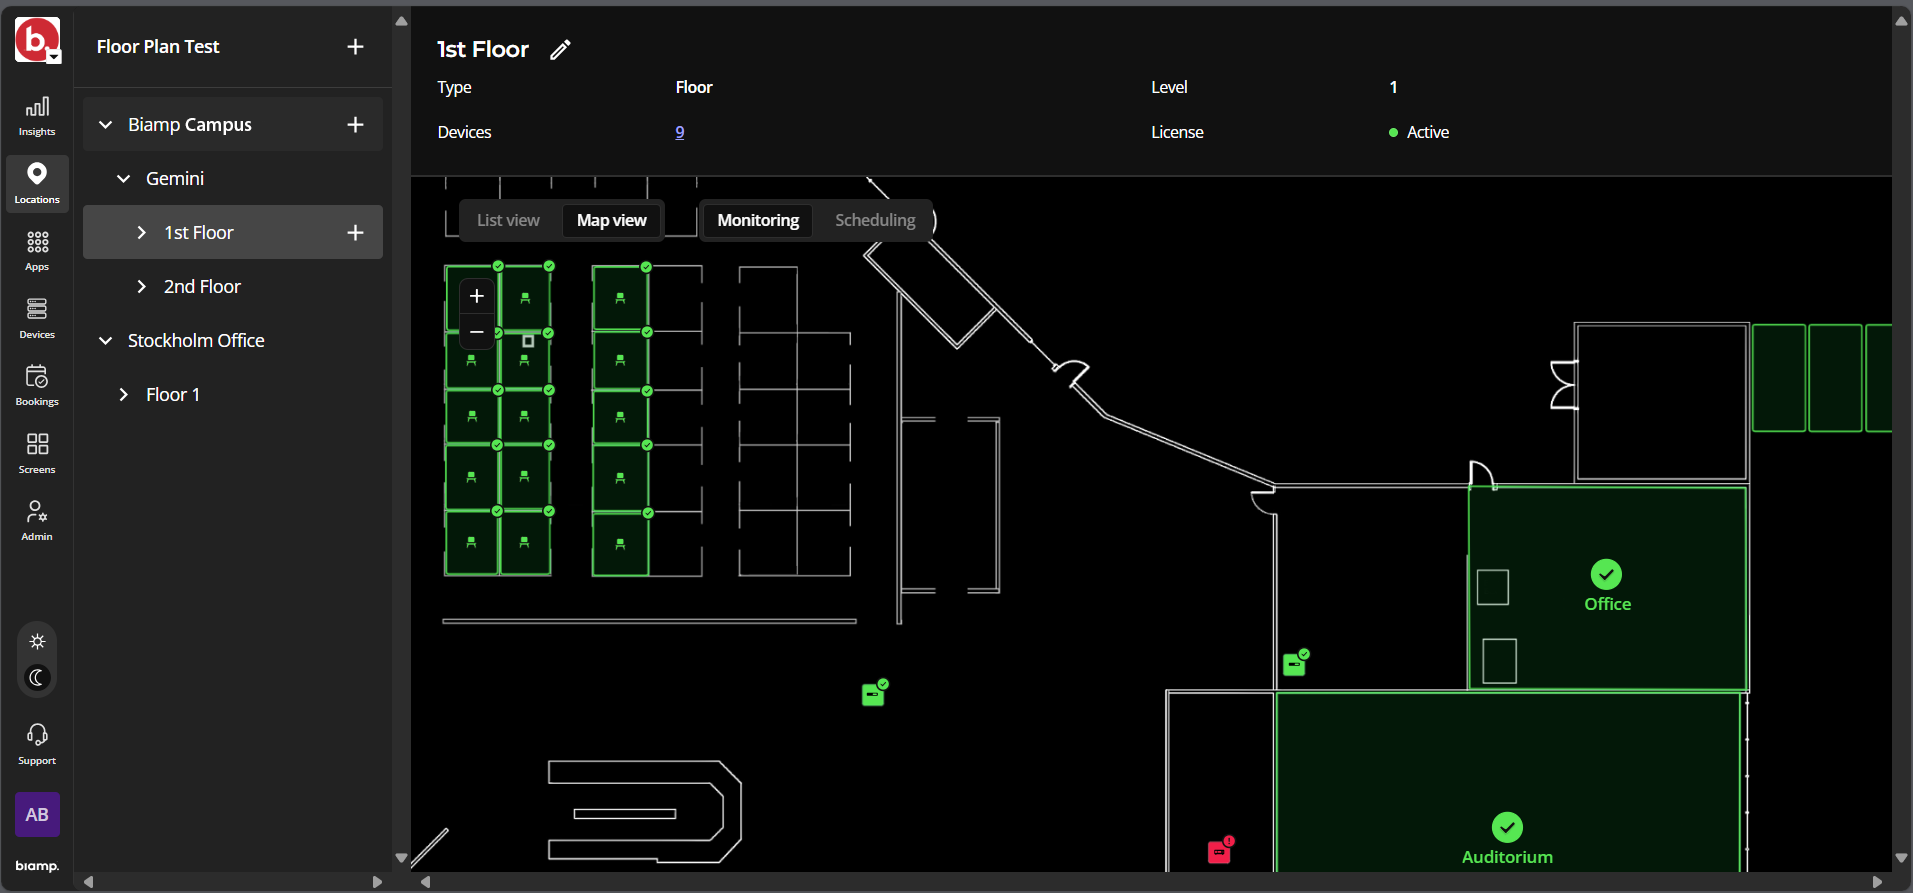
Map Monitoring View - When the administrative map view is toggled to Monitoring, the map displays the location and status of devices.
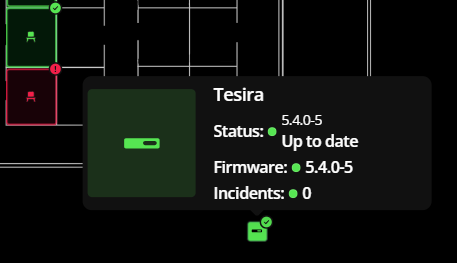
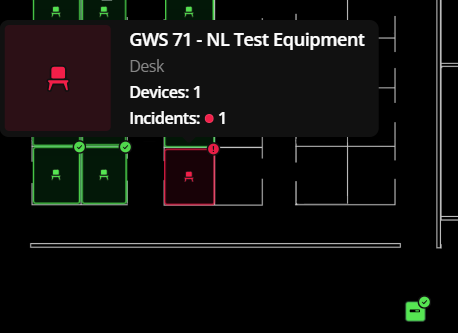
Hovering over a device will bring up a status message window. The following images show a working audiovisual device in green and a booking device in red, indicating the latter has at least one logged incident.
Map scheduling view - When toggled to the Scheduling view, the map displays bookable locations color-coded by availability.
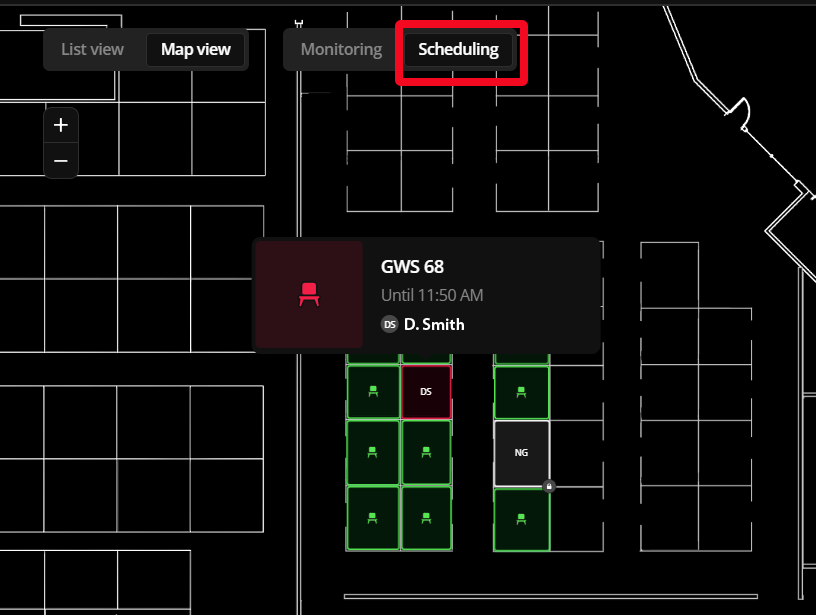
- Green - Available
- Red - Currently booked
- Gray - Dedicated and cannot be booked except by the location owner.
- Dedicated locations are included in the booking management system to make dedicated locations visible on map views and other floor plans.
- End-user Booking app floor plans - End-users can view interactive floor plans with rooms, desks, and parking spaces on the Booking app's Workplace screen.
Booking App floor plans
Floor plans are interactive end-user booking system and navigation aids. If a location plan has been configured for a floor, users can view the map using the Workplace screen of the Biamp Workplace Booking app.
How to unlock a Booking app floor plans: Creating and populating a location plan automatically makes the floor plan available for that Workplace floor location.
This Booking app floor plan example shows 5 bookable meeting rooms and 1 bookable desk.
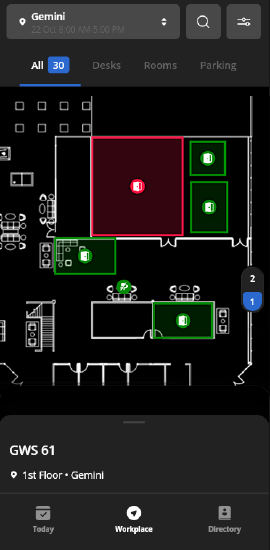
Details: These maps are found under the app's Workplace screen and brought up by selecting the Floor Plan button. The app's floor plan screens do not display AV devices. Only rooms, desks, and parking spaces. Licensed spaces with installed booking devices are interactive on the map. These spaces show their availability based on color coding.
- Red - booked and meeting underway
- Yellow - booked, the meeting will start soon, or requires a check-in to start.
- Green - free for an hour or longer
- Gray - A non-bookable dedicated space added to the map as a navigation aide.
- Tapping or otherwise selecting a space on the map brings up an information and status pane.
- Tapping the information pane brings up booking options.Public overview screen floorplan displays
Public Overview Screen Floorplan Displays
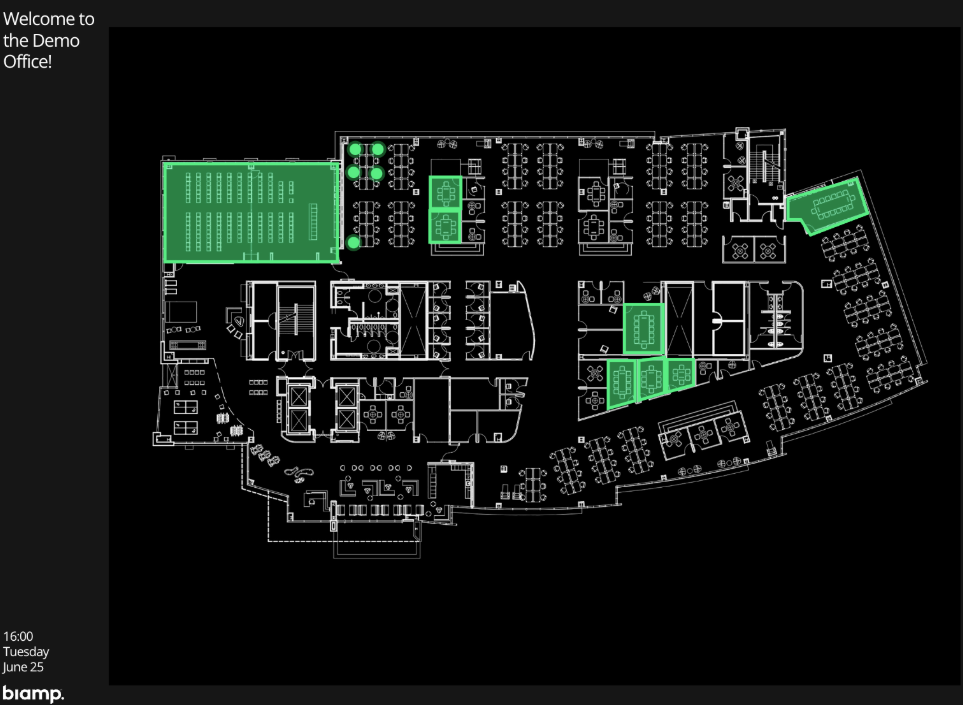
Overview floorplan screens can be shown on public displays at sites where booking systems are deployed.
Overview screens are created in the admin portal, then activated and made visible on public-facing display screens. The floorplan overview screens are based on existing floor Location plans, which are selected for use during the Overview screen creation process.
- For details on overview floorplans, see Overview Screens.
How to create and make an Overview floorplan screen visible: Manually add overview information to a floor-location plan and assign it to a display screen using tools located under the admin console's Screen tab.
For more information on creating a locations plan, see Creating a Locations Plan.